Launching a website is a huge undertaking. We know that working through a web project is no cakewalk, so we’re here to help ensure that the final leg of your journey is as smooth as possible. The finish line might be starting to come into view, but all it takes is one untied shoestring to trip up an entire launch. So let’s double-knot those puppies, take some deep breaths, and get the last few steps of the launch process laid out. You’ll be running through that tape in no time. (There’s another race that starts immediately after, but we’ll get to that later.)
The goal of the pre-launch period is to iron out all the details while also building hype for the final product. The process of actually launching your site may seem overwhelming, but it doesn’t have to. Instead of looking at your launch as one big to-do list, it helps to organize all of the tasks into smaller sections. That brings us to our first objective – getting organized.
GOALS & ROLES
As with any large task, the first step for you and your team should be getting everyone’s positions and responsibilities in order. A website launch involves a lot of moving parts, and it’s important to have a system in place to keep track of them all. In 2020 we’re lucky enough to have productivity apps like Slack and Asana at our disposal to keep a segmented team on the same page. A good old fashioned spreadsheet does the trick too.
Team Buy-In
Change can be scary, especially in the workplace. Before you begin to actually create or redesign your website, getting your whole team on board is critical.
Clearly explain the reason for the change or update. Before any action is taken, it is vital to communicate with your staff about why this change is taking place. Explain to your team members how the new site will benefit them and the company as a whole. Providing this clarity will make it easier for your staff to adapt to the changes and increase morale as they take on any new responsibilities.
Bear in mind that not everyone will make the necessary adjustments at the same rate. Keep your door open as much as possible during this time. By encouraging questions and feedback from your staff, you will be better able to guide them through this transitional period.
“Before any action is taken, it is vital to communicate with your staff about why this change is taking place.”
As an added benefit, when your staff feels appreciated they are more likely to speak highly of your business within their own networks. Word of mouth is one of the most effective forms of marketing, and nobody knows your business better than your employees. Once your team is as excited about this new beginning as you are, they will be ready to help spread the word! Set aside some time for your employees to create social media posts or write blogs relevant to your new site. This is a great way to encourage your team to promote the business directly to their friends and family.
Maintenance
It is tempting to view your newly launched website as a final product. However, the reality of the situation is that websites are like houses and cars – they require ongoing maintenance to keep them fully functioning and up to date. Here at HMG, we include 90 days of post-launch maintenance with any website we create to correct any issues that might arise. We also offer ongoing monthly website maintenance that includes revisions, troubleshooting site functionality, ongoing search engine optimization, updates to ensure consistency across various browsers, and more. If you are working with another web developer, ask them what their options are for these services, and make sure they are clear about what is and isn’t included. They should offer ongoing site maintenance, and if they do, it is certainly worth taking advantage of.

If you are working with a web design company who will be handing over the reins to your staff post-launch, make sure that your team has a solid understanding of how the new site works and what their roles will be in maintaining it. They will also need the login information and passwords for any accounts.
Before HMG launches a new website, we train the client’s team on how to use any systems that were integrated with the site. This includes the Content Management System (CMS), Google Analytics and any plugins. We also provide a manual with step-by-step instructions for editing content within the CMS. Because we believe in empowering our clients for independent administration of their site, we always aim to make their new site as automated, productive, and easy-to-use as possible. Our goal is not only to build a frontend that will remain dependable for years to come but also a backend that is manageable and sustainable.
Hosting
In order for your website to be accessible on the internet, it needs a hosting provider. These providers store your website’s files on their own dedicated servers and then deliver them to your site’s visitors. Hosting is also a service that we facilitate here at HMG, but most of the time, it will not be handled directly by your web developer.
The host provider you choose will depend on a number of factors, including your bandwidth requirements and budget. While there are dozens of hosting options out there, there are three main types that you will find across the majority of providers:
1. Shared Hosting- Shared hosting is like an apartment building, where you rent space on a single server with other websites. This a cost-effective form of hosting, which is usually sufficient for new websites with low data needs. The downside is that you are sharing the server’s resources with everyone else who is on it. If your neighbor’s apartment catches on fire, yours could be in trouble. Similarly, if one of the other website’s sharing your server is using up too many resources, it can negatively effect the performance of your own site. The average cost for shared hosting is $3 – $15 per month.
2. VPS- A virtual private server is closer to a condo — it is still part of a shared server, but acts more like its own dedicated machine. Although a VPS does not have its own server, it is allocated its own chunk of resources. So, unlike with shared hosting, your neighbor’s website activity won’t have any effect on yours. This hybrid hosting option offers a lot more flexibility while still keeping the cost relatively low. The average monthly cost for a VPS is $20 – $80.
3. Dedicated Server- And finally, your very own home. With a dedicated server, you have the entire space of the server all to yourself, and complete control over its settings. This is the best option for any site that receives a lot of traffic or requires a high level of security, but there are some potential drawbacks. As you can imagine, along with this much space comes a high price tag. Hosting your site on its own dedicated server might also require some technical expertise from your end. But if you’re budget and your team’s ability level is up for it, this is the way to go. A dedicated server will run you anywhere from $80 – $300 per month.
PREPARE FOR TRAFFIC
While launching a new website is an exciting sign of growth, there are some things to look out for. Of course you want as many people as possible to visit your site once it goes live, but this spike in traffic can cause problems of its own. If you’re not prepared for it, having too many visitors on your website at once could slow down load times or cause it to crash entirely. This is usually a matter of not having sufficient bandwidth. In order to fix or prevent these issues, you can upgrade your web hosting plan (see above) or do some optimizing of your existing site.
Website optimization is another aspect of the launch process that we do ourselves here at HMG. It should be handled by any web development company you work with, but if you are handling everything yourself, or just want to familiarize yourself with website optimization, here are some things to look out for:
1. Bulky Images- A high number of large images will often bottleneck your site’s performance. Resize or compress large image files to free up some bandwidth.
2. Videos- Like images, videos can be very large files. Hosting videos directly on your site can greatly increase load times, so you’re better off posting videos to YouTube or Vimeo and then embedding them into your web pages. This will help keep the file sizes down and increase your load speeds.
3. Messy Code- Make sure that your website’s code is efficient. Any excessive lines, spaces, and unnecessary comments will lead to longer load times.
4. Flash Content- Similar to images, Flash files can be very large and eat up valuable bandwidth. Although interactive content can add some pizzaz to your site, consider keeping it to a minimum during your launch. Your bandwidth will thank you.
5. Caching- Caching stores certain elements of a website for future visits. With caching enabled, a returning visitor’s browser only has to download a few resources instead of all of them.
6. Too Many Ads- Capitalizing on website traffic with a few appropriate ads is great. Overloading every page with them is not. Excessive ads will slow down your site while making it seem “spammy” and congested.
Of course, too many visitors to your site could be seen as a good problem to have. On the other hand, not having enough traffic could mean that you didn’t market your launch correctly. Next we’ll look into some practices for getting visitors, and keeping them.
GOOGLE ANALYTICS
Google Analytics is an essential web service for tracking your website traffic. This tool gives you insights on all kinds of valuable information, such as where your site’s visitors came from like, what pages they clicked on, and how long they spent on your site. All of this info can be used to track your return on investment for your current marketing efforts, and is a great source for future marketing strategies.
Setting up Google Analytics for your site is an extremely important, but simple process. If you are currently designing a new website for your business but didn’t have Google Analytics for your previous site, don’t worry! It would still be valuable to install Analytics on your old website, as the information you gather can help predict the traffic you will be receiving to the new one.
Setting Up Google Analytics
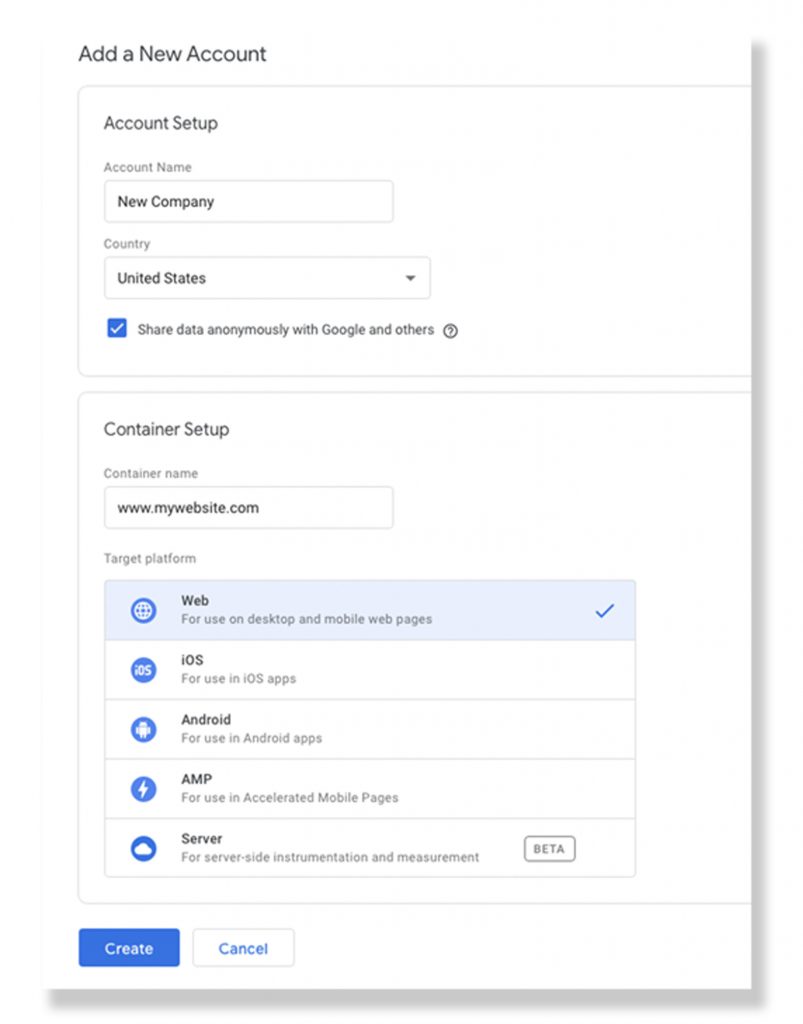
1. First you need to set up an account on the Google Tag Manager Dashboard. Here you will add an account and set up a container for your tags. Tags are the snippets of code that will allow Analytics to track the activity on your webpages.
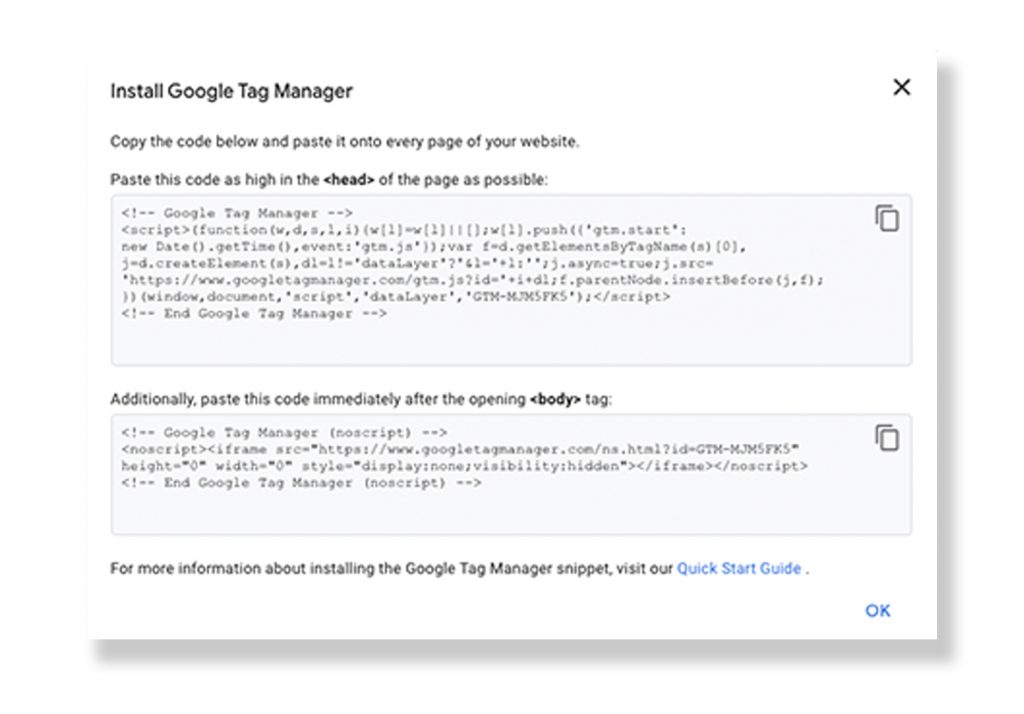
2. Tag Manager will then generate the code for your container. Copy and paste this code into each page of your site. As Tag Manager will instruct you, one part needs to go into your header, and the other should go in the page’s body.
3. Next, navigate to Google Analytics and click “Start Measuring.” This is where we’ll set up your actual Analytics account. Enter your account, website name, and its URL.
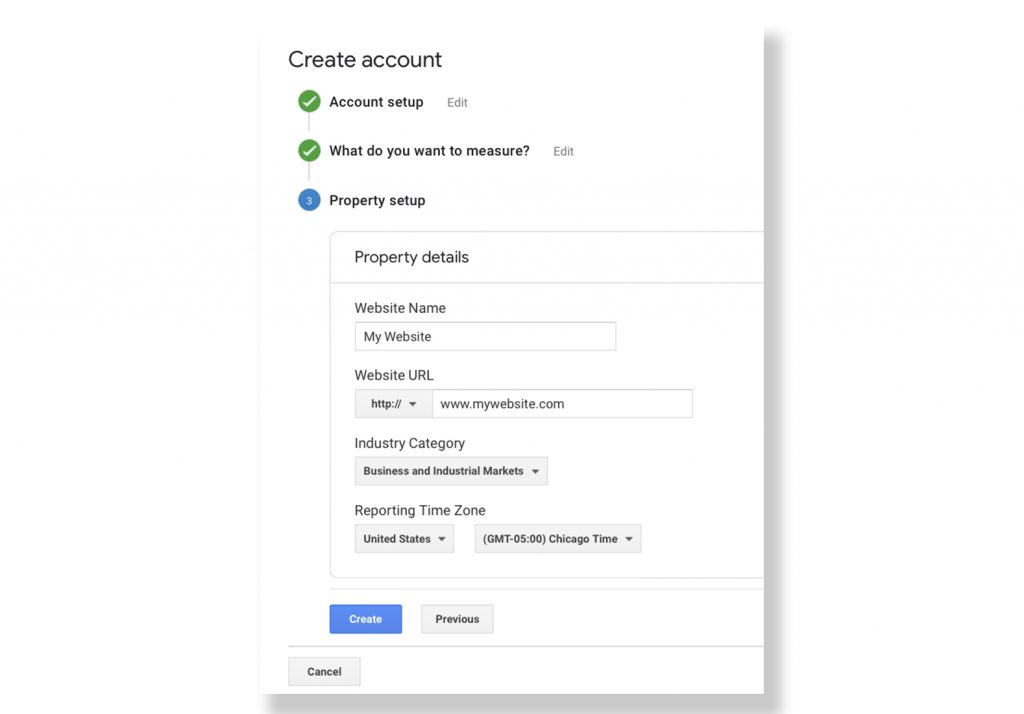
4. Once you enter this information and accept the Terms and Conditions, you will have your Tracking ID.
Now that you have both your container and your Tracking ID, you’re ready to start setting up tags.
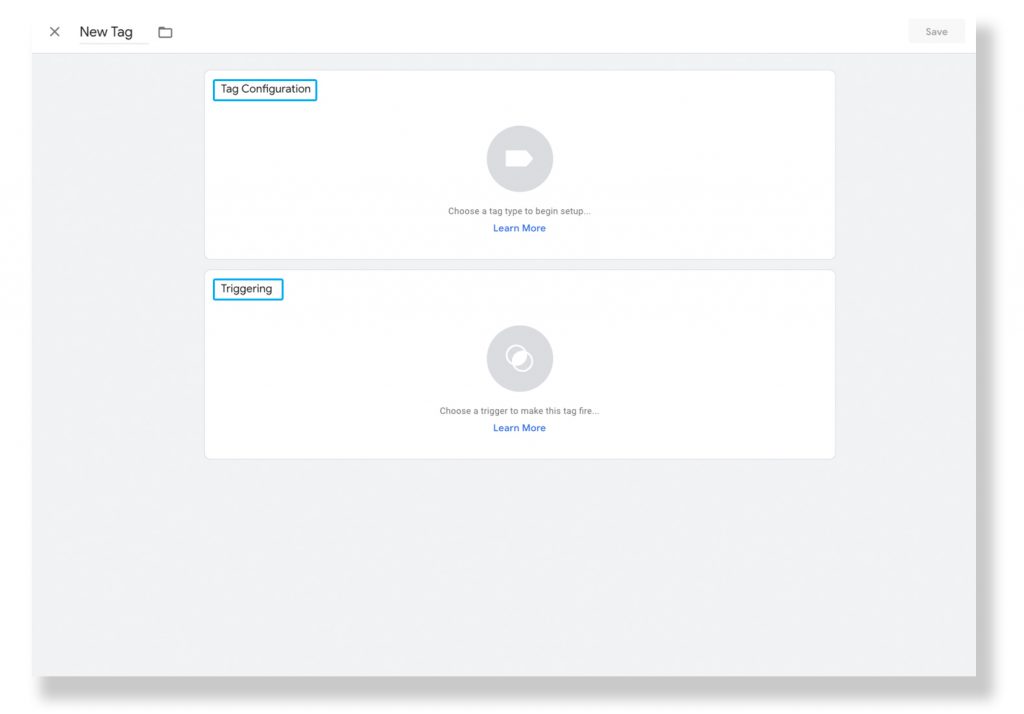
5. Go to your Google Tag Manager dashboard and click “Create New Tag.” On this new tag, you will be able to customize your Configuration and Triggering. Configuration is where your collected data will go, and Triggering is the type of content you want to collect. In Configuration, you’ll need to choose “Universal Analytics” as the tag type to create a tag for Google Analytics.
6. Next, in the Configuration window, choose “New Variable” from the dropdown menu. This will open a new window where you can enter your Google Analytics Tracking ID.
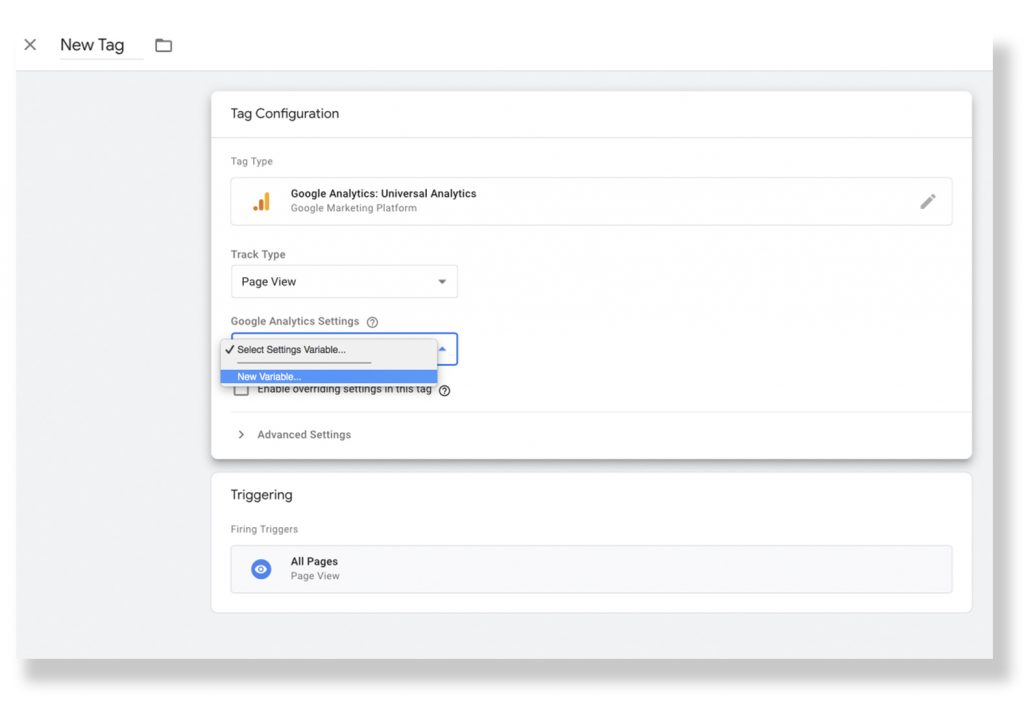
7. Lastly, in Triggering, select “All Pages” so Google will send you data from all of your webpages.
Then click Save and you’re done! This Google Tag will now be tracking data from your website, and sending it to your Google Analytics page.
GOOGLE ALERTS
Of all the products Google offers for marketing and managing websites, Alerts is one of the most powerful. Essentially, it allows you to set up automated Google searches for specific keywords, like your brand and product name, and then emails you the results. By setting up Google Alerts for your brand, you will be notified any time you are mentioned on the web. This is extremely useful for a number of reasons.
Firstly, you will be notified whenever another site or blog links to you. It is important to know where your traffic is coming from, as this information can help you focus in on your target audience and guide future marketing strategies.
Second, you will be alerted whenever another site mentions you without linking to your site. This creates an opportunity to reach out to that site’s author and ask them to provide a link. Without Google Alerts in place there is a fair chance you would have never come across this content, and missed out on this traffic driving potential.
Aside from keeping tabs on your own company across the web, you can even set up alerts for your competitors and industry topics. Staying on top of activity in your field and keeping an eye on your competition are both essential for staying ahead of the curve. While this would usually involve a lot of time consuming research, Alerts makes it easy.
So let Google do your web searching for you. They’re great at it.
Setting Up Google Alerts
1. Navigate to Google Alerts and make sure you are logged in at the top right corner of your screen.
2. Start with your typing in your domain name without the www or https.
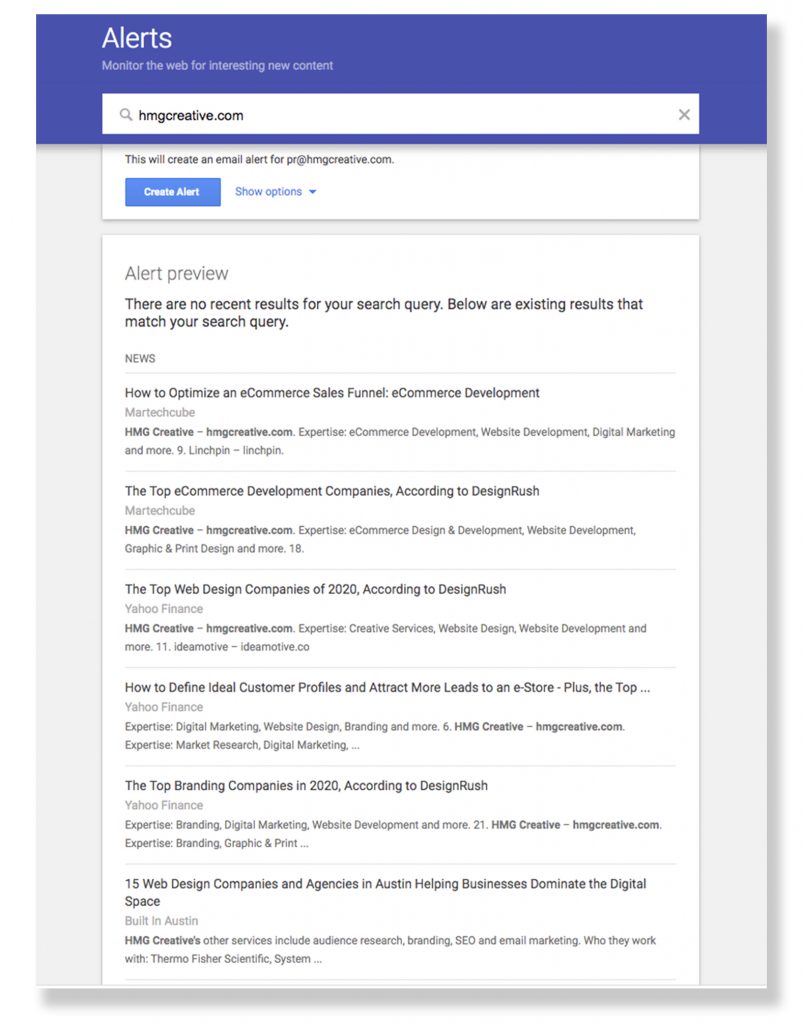
3. Click “Show Options” next to the “Create Alert” button. These settings will take some playing around with to really dial in, and can be changed later. Some sources will be more useful than others depending on your business type.

4. Once you’re happy with your settings, click “Create Alert” and that’s it! Google will now be emailing you on the basis you specified with potential leads and link building opportunities.
5. Repeat this process with your company name, email address, competitors, and anything else that you want to keep up with.
Alerts can be a fantastic tool, just be careful not to overwhelm your inbox with too many notifications.
LANDING PAGE
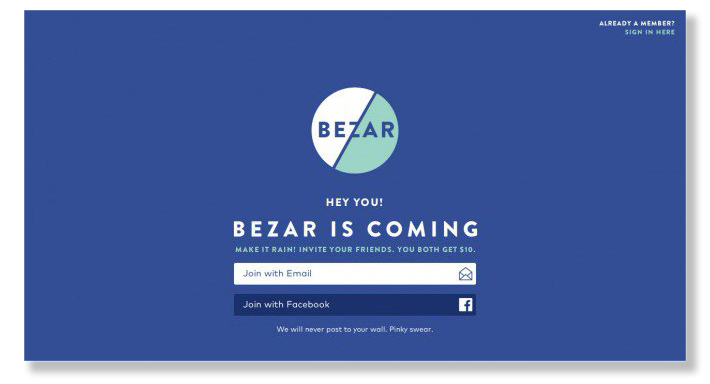
If your website is going live in the near future, you and your team are surely working out the kinks behind the scenes while also trying to build anticipation for launch day. The best tool to start getting the word out is a landing page.
This is a simple webpage that acts as a preview of your official site. Even though your site is still under construction, your landing page will begin to make it real in the minds of your audience. It won’t have the content or bells and whistles of the real thing, but it will be something that you can begin promoting with. Think of it like a movie trailer. Better yet, add a place on the coming soon landing page for people to sign up for your email list. Now it’s a movie trailer that people can buy tickets from. This allows you to begin collecting information from individuals who are already interested in your business.
You don’t need to wait until your site is live to start capitalizing on this early following, though. Send your contact list a promotion or some shareable content in the weeks leading up to your launch to get them even more excited and help turn them into advocates. While all this promotion is well and good, getting people to the site is only part of the goal.
CONTENT
First impressions are important, especially digital ones. If people visit your new site and there’s not much to engage with, chances are they won’t be sticking around. Just like the opening night of a new restaurant, people want to experience what you have to offer. As your site is being built, you should prepare some engaging content for people to engage with. If you can show that your site has value from day one, people will be back. If you launch with a shell of a website, your visitors will simply go elsewhere.
Aside from adding flavor to your website, high quality content can help your SEO, provide value and education to your visitors, and help increase conversions. Pieces of lead magnet content, such as downloadable eBooks or webinars, are also essential to have for your launch. These will allow you to capitalize on your site’s traffic by adding new visitors to your contact list. Don’t worry, your site doesn’t have to be teeming with content from day one. If anything, you’ll want to keep some ready to roll out after launch to keep your audience engaged. But there are a few pieces of content that are certainly worth having published for when your site goes live:
1. Blog- A blog is a great way for your business to create shareable content that shows your expertise. A strong blog can also play a valuable part in your ongoing SEO efforts.
2. eBook/White Paper- If you’re looking to capture some leads, these are great options. Both eBooks and whitepapers are long form guides covering topics that your company has expertise in. eBooks generally offer a broader look at a topic, while whitepapers are a deep dive into a specific subject. Post a download link to your eBook or whitepaper, and require users to enter their email address to receive it. They get some great content that they will want to share, and you add a contact to your list!
3. Infographics- Infographics are exactly what the name implies — a visual illustration of some information. Forming some important data into a visually stimulating piece of content will help it attract more attention and make it more shareable. 90% of the information transmitted to the brain is visual, so graphics naturally do a much better job of conveying a message than plain text.
4. Portfolio/Case Studies- Case studies will give your potential customers an idea of how you work and think. These don’t need to be overly detailed, but be sure to include each project’s goal, details on the client, the challenges that were faced, how you approached these challenges, and the final result.
5. Reviews/Testimonials- Obviously, if your company is brand new you won’t have these yet. But, showing off any existing reviews or testimonials that you may have can greatly increase your trustworthiness in the eyes of new potential customers.
“If you can show that your site has value from day one, people will be back.”
SEO FOUNDATION
Search-engine optimization is the process of optimizing your site to increase organic traffic from search engine results. Google is constantly scouring the internet, using bots known as “spiders” or “crawlers” to evaluate and index websites along with the content they contain. When a user performs a search, Google reaches into its vast library and delivers the sites and information that it deems to be the most relevant.
Google holds the keys to the internet, and once you understand how it reads and ranks your website, it will be your friend instead of a hurdle. SEO is an ongoing process, but the returns that you can receive from keeping up with it properly can be great.
At HMG we build your site for optimal performance by laying the right SEO foundation. These are the steps that we take:
1. SEO Brief- We’ll perform an audit to take a look at the top pages of your site and identify opportunities and risks during the design.
2. Keyword Research- By analyzing your existing website, competitors, and the proposed site structure, we’ll identify core keywords used by potential customers.
3. Keyword Mapping- Based on our research, we will assign keywords to strategic pages based on relevance and search intent and according to the approved site structure.
4. Yoast SEO- We will set up and configure the YOAST SEO extension in WordPress to guide SEO best practices as we develop your site and as it evolves over time.
5. Page Specific Optimizations- In the dev environment, we will optimize page elements such as titles, headers, tags, and metadata, with recommendations to improve the visibility of mapped keywords.
6. Redirection Setup and Support –We will create a 301 redirection or mapping document that will successfully migrate the URLs of the old website to the new website.
7. Launch Support- Upon site launch, we will crawl the site as Google does to identify any issues and will verify that all optimizations and redirects have been implemented.
This is all just to set the foundation for your SEO. As search engines make changes to their algorithms, your SEO strategy must also evolve to remain effective. At HMG, we offer ongoing SEO to help your website continually grow organic visibility in search engines. This includes things like monitoring your Google Analytics, fixing broken links, ensuring your images have the correct metadata, and more!
QUALITY ASSURANCE
No doubt you and your web development team have already committed a ton of time and effort to the design and layout of your website. In the weeks leading up to the launch, it’s time to go over it with a fine-tooth comb. We’ve put together a list of some of the essentials to check for. If you are working with an outside web development company, they should be handling most, if not all, of this themselves. However, it’s important that you communicate with them about what they will and will not be handling, so you know what you will be responsible for.
1. Profread Everything!– See how important that is? Check for any spelling or grammatical errors.
2. Check Your Images– Make sure you’ve replaced any placeholder images, and have the legal rights to any photos you’re using.
3. Test Your Links– Your visitors are going to want to check out your entire site. That will be hard to do if the links don’t bring them to the correct places.
5. 404 Page– Whenever a user ends up on a “broken” or “dead” link, they will receive a 404 error page. In most content management systems, there are standard 404 pages built in. At the very least, they should contain a link back to your homepage to keep visitors from leaving the site. If you want to take it a step further, designing a custom 404 page can be a creative opportunity to apologize to the user and help them find the page they were looking for.
6. Load Time– For every extra second it takes for your site to load, you will be losing visitors. Google found that 53% of people will leave a site if it takes more than 3 seconds to load! Needless to say, make sure your site loads smoothly on all devices and browsers. If it is on the slower side, consider doing some optimizing. It will be well worth the effort.
7. Mobile– Over half of internet usage now takes place on mobile devices, so mobile-friendliness is vital. Building on the previous tip, check your site’s responsiveness on as many devices as possible. You will also want to make sure the layout and design is consistent. Google even has its own Mobile-Friendly Test that you can use!
8. Test It!– Once again, go through your website as a potential visitor would. Check over all the details listed above while making sure that the site is intuitive and easy to navigate.
READY FOR LIFTOFF
Throughout the entire launch process, it’s important to keep in mind that your website is an extension of your business. All of the decisions that you make regarding your site’s design, content, and messaging should be properly grounded in your brand. Your website is often the first point of contact between your business and a potential customer, so keep it honest and avoid cutting corners.
As we mentioned earlier in this article, the launch of your website is just as much the end of one race as it is the beginning of another. Now that your site is up and running, there are ads to run, pages to optimize, and A LOT more. You can read all about what to do next here, or contact the HMG team to help keep things rolling!